Showing posts with label recipes. Show all posts

Recipe: Overnight Oats

29.4.15


Well, I've been meaning to get this post up for days, but it's been hectic around these parts lately.  Which, when I think about it, makes me even happier that I've started doing this make-ahead breakfast.  Some days, even making toast feels like too much of a time commitment. Having a kid to get off to school and a phone that is bleeping at you with important emails and a to do list that is sadistically whispering your name from the next room?  Not conducive to a leisurely breakfast. 

Enter Overnight Oats!

What you'll need:

1/2 cup of rolled oats 
1 cup coconut milk
1 teaspoon hemp seeds
1 teaspoon chia seeds
1 teaspoon shredded coconut
maple syrup (to taste)
toppings!

Directions:

1. Mix the dry ingredients together 
2. Stir in coconut milk
3. Add maple syrup (I use probably 1/2 teaspoon at this stage)
4. Cover and refrigerate overnight
5. When ready to eat, top with fruit of your choice and add another drizzle of maple syrup


It's sort of magical what happens when the oats and seeds soak up the coconut milk.  I find I can eat one of these myself the next day, but if you leave them in the fridge longer then that they get too thick. If I make up a batch on Sunday, by Tuesday I'm scooping out half of the contents of the jar into a bowl, adding another splash of coconut milk to thin out the consistency and then topping.  These bad boys are cost effective, yummy, take about zero effort and are full of nutrients and protein.

Right now I'm topping mine with blackberries, strawberries, more shredded coconut and a drizzle of maple syrup.  I think mango and kiwi would be great as well.  Also?  If you've got a picky eater why not top this with chocolate chips?

Let me know if you give this a try and what variations you like.  I think any sort of milk would work and the options with toppings are unlimited!  Here's to less stressful mornings for all of us...


Recipe: Mixed Berry Compote for Pancake Tuesday

17.2.15


Easy and yummy and perfect on pancakes...it's Mixed Berry Compote time!


What you'll need:

2 pints of strawberries
1 pint of blueberries
1/3 cup of water
2 tablespoons of raw sugar
1/2 lemon, juiced and zested
Splash of Beaujolais wine (optional)


Directions:

1.  Rough chop the strawberries and combine them, in a pot, with the water and sugar.  Cook on a moderately high heat until the water becomes syrupy (7 - 10 minutes)

2.  Add the blueberries and the wine (if desired), let cook down for another 7 - 10 minutes.

3.  Remove from heat and finish with the lemon juice and lemon zest.

4.  Taste.  If it's not sweet enough for you, consider adding a little more sugar.  I like to keep my compote on the slightly tart side, especially since the berries have so much natural sweetness.

5.  Serve with pancakes, waffles, ice cream or yogurt!


If you enjoy this, check out my recipe for Strawberry Rhubarb Compote in the Spring!  Happy Pancake Tuesday!


Recipe: Jamie Oliver's Epic Roast Chicken Salad

4.11.14

This is one of those recipes you come across and immediately think "I MUST COOK THAT!"  Jamie never fails, you guys.  We know that.  And while this was a little more work than I thought it would be it was definitely worth it.  The leftovers were killer too, which was a huge surprise.


What you'll need:

  • olive oil
    1 x 1.2 kg chicken
    sea salt
    freshly ground pepper
    a small bunch of fresh thyme
    1 lemon
    400 g mixed cherry tomatoes
    1 bulb of garlic
    1 country loaf (roughly 300g)
    6 slices smoked streaky bacon
    200 g green beans, topped
    extra virgin olive oil
    1 tablespoon wholegrain mustard
    cider vinegar
    a bunch of fresh flat-leaf parsley
    a bunch of fresh mint
    6 green onions

Directions:

Preheat your oven to 400°F.  Drizzle olive oil all over the chicken and sprinkle it with salt and pepper. Pick and scatter over the thyme leaves (reserving the stalks). Rub the flavours into the skin, then halve the lemon and put it inside the cavity along with the thyme stalks. Pop the chicken into a large roasting tray (roughly 25 x 32cm) and cook in the oven for 1 hour. Meanwhile, halve the cherry tomatoes, then smash up your garlic bulb and discard the papery white skin. After about 30 minutes, throw the tomatoes and garlic into the chicken tray, ideally holding the chicken up with tongs while you slush everything around and coat the tomatoes in the juices underneath. Put the chicken back on top, then return it to the oven for the remaining 30 minutes, or until the chicken is golden and the juices from the thigh run clear when pricked with a knife.

Transfer the roasted chicken to a plate, cover with tin foil and leave to cool. Tear the bread into the roasting tray in thumb-sized croutons, then toss them in all the cooking juices. Spread the croutons out in the tray and lay the rashers of bacon on top. Pop back in the oven for around 15 to 20 minutes, or until everything is crispy, golden and gorgeous.

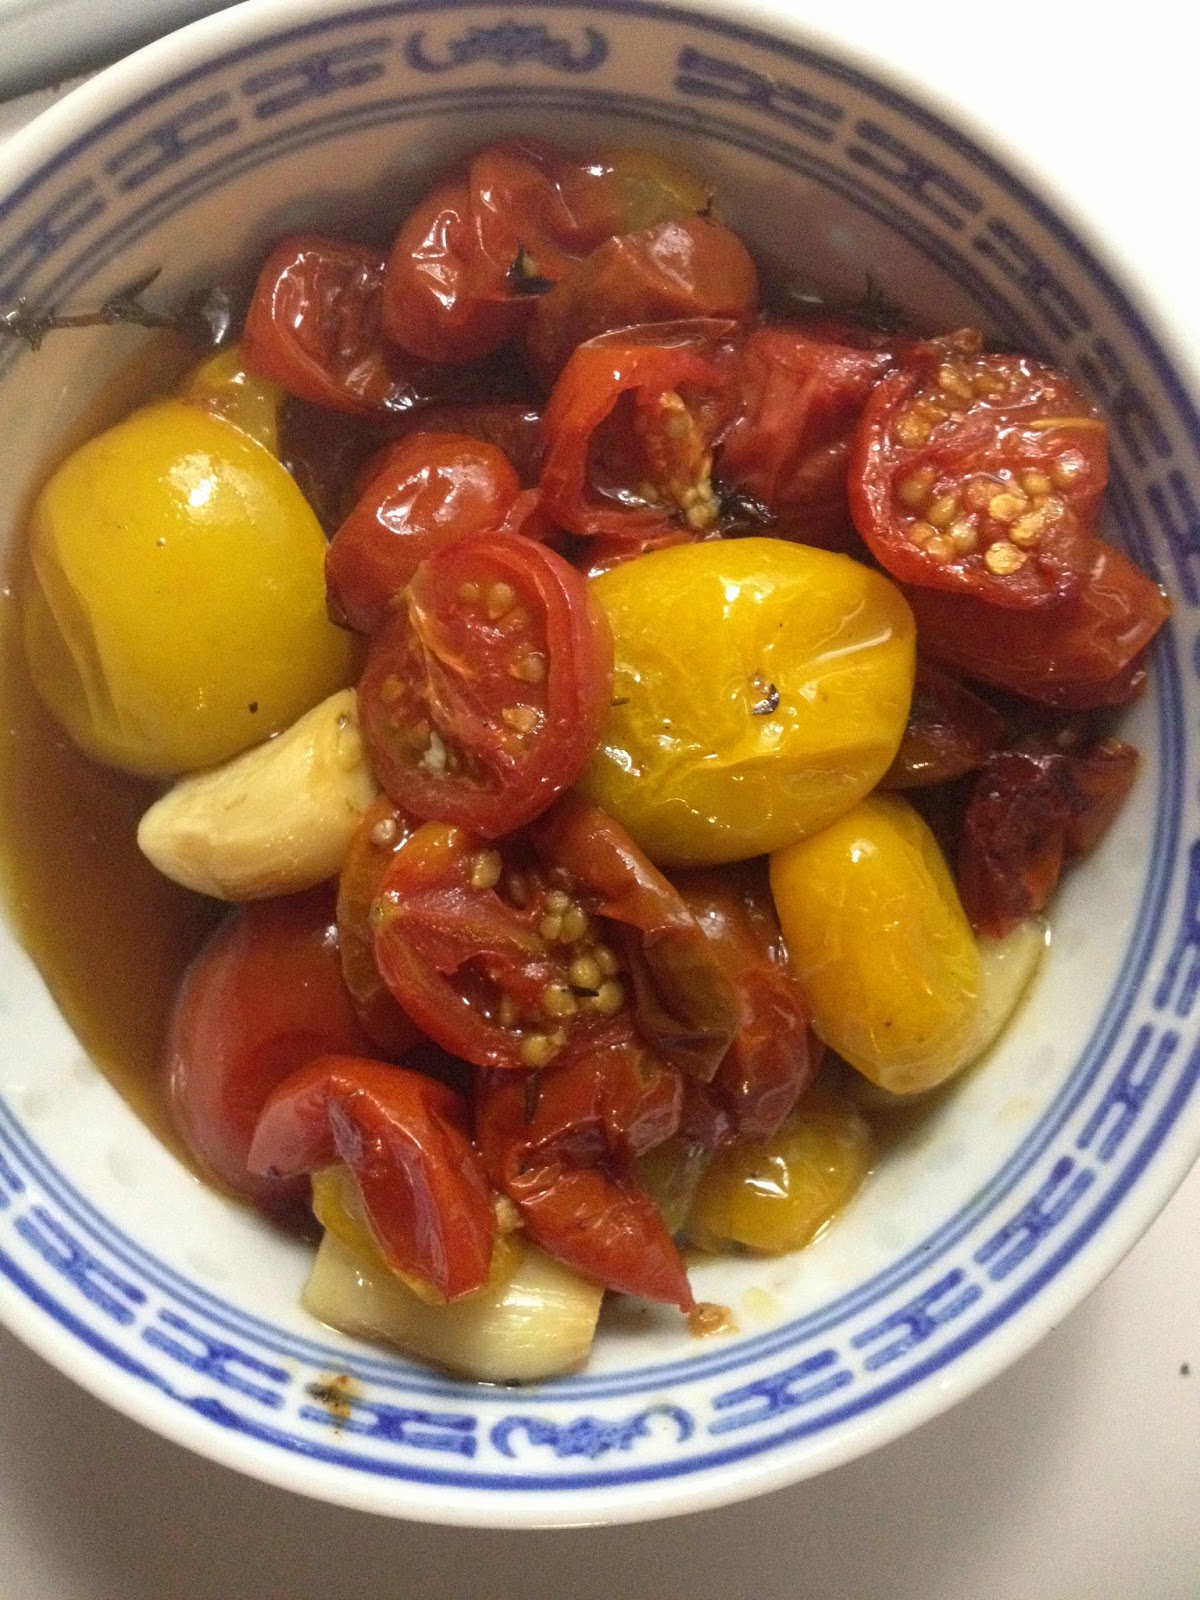
These tomatoes were from our garden.  I can hardly believe it.  They were delicious.  What a sense of accomplishment I had cooking and eating something I grew.  Who knew!


Meanwhile, remove all the chicken skin and set aside, then use two forks to strip every last bit of meat off the bone. Pile the meat into a large bowl and drizzle over any resting juices from the plate. Cook your green beans in boiling salted water for 5 to 6 minutes, until cooked but not squeaky when you bite them. Quickly drain and add them to the bowl of shredded meat, with 5 to 6 tablespoons of good-quality extra virgin olive oil, the wholegrain mustard and a few good swigs of cider vinegar. Chop up the parsley and mint leaves and finely slice the spring onions. Add them to the bowl. Toss everything together, then have a taste and adjust with more vinegar or seasoning if you like.
Once the croutons are golden, quickly tear the chicken skin into the roasting tray (skip this if you want a healthier salad, I did) and put back into the oven just until it crisps up again. When it's looking lovely, tip everything from the bowl into the tray or on to a large serving platter. Toss everything together and serve in the middle of the table.
 

Does it sort of look like a dog's breakfast?  YEP.  But it tastes AMAZING!


The Kitchen Diaries: Grounded by Basil.

10.9.14

While I've been slowly easing into the changes that having Lenny in school have brought, I'm still feeling somewhat...rudderless.  There are many changes afoot with my work life as well.  I recently wrapped with an amazing client after two great years of managing their social media efforts (shout out to Butterball Canada!) and I'm about to get started working with a new client (which I can't talk about yet because I signed a non-disclosure agreement) but the start date has been moved and now I'm sort of playing a waiting game.  Yes, I have plenty to keep me busy with other freelance work and things around the house.  Yes, I could relax and enjoy some down time.  But the reality is, despite all that, I'm still feeling scattered and a little directionless.

So while I tried to get my head in the game today, I took a few minutes out to make myself a nice breakfast.  I brewed some coffee and made some toast and scrambled two perfect eggs.  I scattered some fresh basil on top from a basil plant on my windowsill that my friend Louisa brought over last week.  And right then, I had what I can only describe as a moment of clarity.

I can still smell the basil on my fingers.  It brings me a great sense of joy and fulfilment.  I feel anchored by it?  I do.  I feel grounded.  In a good way.


This makes me search back over the last couple of weeks to think of other calm moments and I realize that almost all of them are attached to cooking and eating.

---

It's Labour Day Monday and we're taking it easy at home.  Lenny has a cold and we want to make sure that she gets better before her first day of school on Thursday.  I consider making her chicken soup because she's not well and has never had it (how did that happen?) but instead I ask her what she wants and the request comes in for mashed potatoes. Classic comfort food.  What to cook with it?  There is some stew beef in the freezer so I thaw it and then braise it all afternoon.  Onions, carrots and parsnips are soft and flavourful.  The beef stock simmers down to almost nothing until I add more stock to create a nice sauce.  The whole thing is scented with Garlic and Bay.  It's rustic and delicious and the beef is as tender as can be, but hasn't fallen apart.  The leftovers make a beautiful lunch the next day.  I think I could eat this dish every day.  It makes me want to curl up with a good book and listen to The Velvet Underground.

---

I've been threatening to make hummus for years.  I know it's not hard and way more cost effective than buying it pre made but I haven't done it.  I finally bust out the food processor and give it a go.  I keep it simple: chick peas, garlic, lemon, tahini and olive oil.  Too much garlic.  Like way too much.  And I love garlic.  I end up having to add another can of chick peas to balance the flavours.  It ends up tasty but there is so much.  Not sure how long it will take us to eat it all.

---

Cauliflower is on sale for $1 a head so we buy several for making soup.  Sure, Mark Twain said "Cauliflower is nothing but cabbage with a college education", but I like the stuff.  I rough chop the crumbly florets and the thick stems and roast them in the oven with olive oil, salt and pepper.  The next day I simmer the already soft and flavourful cauliflower in a mix of vegetable stock and water (4 cups each) with some onion powder, garlic powder and cajun spices. Later that afternoon I puree the whole mess and it makes for a silky, golden brown coloured soup.  We eat it for dinner and freeze the rest for one of those days down the road when we have neither the will or time to prepare dinner.  I swear that next time I will make some croutons to float on top with a handful of fresh herbs.  That may not happen, but I tell myself it will.

That's the thing about cooking.  The promise of old comforts and new horizons are endless.  Anything can happen, but even if it fails, there's still the smell of that basil, bringing me back to earth.


Recipe: Watermelon and Bacon Salad

29.7.14


What you'll need:

1 small Watermelon or 1/2 a larger Watermelon
4 slices of Bacon
Green onions
Olive Oil
Course Sea Salt
Fresh Cracked Pepper

Directions:

1.  Snip the 4 slices of Bacon into bite-sized pieces into a skillet or frying pan.

2.  While the Bacon is crisping up, slice the Watermelon thinly and arrange on a platter or large plate.

3.  Drain the Bacon well.

4.  Drizzle the Watermelon with Olive Oil and season with Course Sea Salt and Fresh Cracked Pepper.

5.  Sprinkle Bacon on top of the Watermelon.

6.  Garnish with ribbons of Green Onion (the green part).

Verdict:

This works nicely as a light appetizer before a BBQ with cocktails (think Gin and Tonic or Sangria).  I love the sweet and salty combo of the Watermelon and Bacon!  If you want to be more refined about things and really impress your guests, check out Martha Stewarts recipe for Watermelon Carpaccio, which was my inspiration for this little salad.  Let me know if you try this one out!


Recipe: Michael's Classic Strawberry Shortcake

5.7.14


This is, without a doubt, my favourite Summer dessert.  Several years ago our friend Michael made this for us and I was hooked.  Michael is a ridiculously good cook.  He can also do this:


Yes, that's the Robeau on piano!  And yes, you should just go ahead and ignore my terrible camera work.  Thanks for asking.

When I asked Michael for the recipe he sent me these pics.  So I guess technically this isn't Michael's Strawberry Shortcake, it's Susan's.  Shout out to Susan.  Whoever she is!

(click to enlarge)
I'm including the original recipe here because there are several different methods that you can try including pin wheels.  I always do the drop biscuits because I'm a lazy baker.  Happily, my laziness doesn't effect the deliciousness of these things in the slightest.

What you'll need:

2 cups sifted all-purpose flour
3 teaspoons baking powder
3/4 teaspoon salt
5 tablespoons granulated sugar
1 teaspoon grated lemon (or orange) zest
1/2 cup of butter (or shortening)
1 egg, beaten
1/2 cup butter


Directions:

1. Start heating oven to 450 degrees.  Into mixing bowl, sift flour, baking powder, salt, sugar; add lemon zest

2.  With pastry blender or 2 knives, cut butter into flour mixture until it is course, like corn meal.  Add egg and milk.  Mix.

3.  Drop dough in 3" mounds onto cookie sheet (that is greased or lined with parchment paper)

4.  Bake 12 - 15 minutes or until done.  You'll know when they're done because, oh, the smell!


I like to serve these split and still warm with fresh Ontario Strawberries that have been macerated in just a little bit of white sugar and then cover the whole mess with some whipped cream, scented with vanilla bean, but otherwise unsweetened.

If you want to get a little fancier, you can macerate the Strawberries in a good balsamic vinegar, black pepper and fresh mint or basil (more on that flavour combo here).


Verdict:  Make this! Server it at a BBQ!  In fact, make it tomorrow morning and have it while you're watching Breakfast at Wimbledon.  Because having Strawberries and Cream for breakfast while you watch athletes at the top of their profession is a noble tradition that should be continued at all costs.

 Thanks for this great recipe, Michael!


Recipe: Roasted Garlic & Parmesan Mashed Cauliflower

18.6.14


I've been loving mashed cauliflower lately. And you can trust me, you guys...I'd never try to fool you into thinking you're eating mashed potatoes. I can't stand that kind of trickery. Let the cauliflower shine on it's own.

What you'll need:

1 Head Cauliflower
4-6 cloves garlic, peeled
Extra Virgin Olive Oil
Salt & Pepper
1/3 cup Cream or Milk
1/3 cup Parmesan
Butter (to taste)
Chives (minced)

Directions:

1.  Clean cauliflower and break into large pieces. Drizzle the cauliflower and garlic cloves with olive oil and season with salt and pepper.

2.  In a large piece of aluminum foil, tightly wrap cauliflower flowerettes and peeled garlic cloves and bake at 350°F for 45-55 minutes or until tender.

3.  Put into casserole dish and mash to desired consistency. Add butter and cream (or milk) and mix in well.

4.  Add the grated Romano cheese and chives. Correct seasoning and serve!

Verdict:

This is really flavourful, especially because of the roasted garlic! I think it makes a beautiful side dish. I also love that it is infinitely adaptable. I've tried this many different ways, with different herbs and amounts of cheese and butter. I find that you want to be judicious about how much dairy you add...even a little too much can send this over the edge into too-rich-land. But just enough? Perfection!


Recipe: Annette's Step Into Spring Dip

26.3.14


This weekend Annette and I had a playdate with her girls and my girl and an amazing thing happened...they played alone...in a different room.  That magical moment has arrived.  That moment where we're the moms who sit at the kitchen table and catch up over a cup of coffee while the kids do their thing.  Or in our case, first a cup of coffee and then this amazing creation, which I would have happily spooned into my mouth...don't worry, we opted for Multigrain Tortilla Chips instead.

What you'll need:

2 Zucchinis, diced
1/4 cup of onion, diced
1 clove of garlic
1/2 cup of marinated artichokes
1/4 cup of pancetta or bacon, diced
2 tablespoons of cream cheese
3 tablespoons of mayo
1 teaspoon of paprika
1 teaspoon of dijon mustard
1/2 cup of gruyère cheese, grated
1/4 cup of parmesan cheese, grated
salt + pepper to taste

Directions:

1. Sauté the zucchini, onion, garlic, artichokes and pancetta in the olive oil over medium heat until soft.

2.  Season while cooking with the salt, pepper and paprika.

3.  Once the ingredients are all soft and translucent, remove from heat and let cool.

4.  Combine the cooled ingredients with cheese, mayo and dijon and blend in the food processor.

5.  Correct seasoning, and enjoy!

Verdict:

This dip walks that line between decadent and fresh so brilliantly.  I think it would go beautifully with a platter of fondue type items (I'm thinking crusty bread, little pickles, that sort of thing) and a bottle of Pinot Grigio.  Bonus? It's a great way to use all that Springtime zucchini!  This is no surprise, my BFF has been a "master of dippage" since our junior high school days.  Let me know if you and your besties try this one out!


Recipe: Chickpea Curry with Coconut Rice

4.1.14

I've been craving a cozy evening at one of my favourite Toronto restaurants lately.  Maybe some sticky coconut rice at The Queen Mother.  Or even better, a plate of golden, saucy curry at Salad King.  Love me some Salad King.  But, you guys, it's COLD outside.  And cooking at home is so much more economical and ultimately, more satisfying. So...Saturday night in it is!  Project: Curry and Coconut Rice is on!  I wandered Pinterest and Google looking for a recipe that looked easy and delicious and I couldn't find one, so I got the gist of the method and decided to wing it.


What you'll need:

 Coconut Rice

1 1/2 cups jasmine or other long grain rice
1 1/2 cups canned coconut milk 1/2 cup water
1 tablespoon coconut oil
1/4 teaspoon salt

 Chickpea Curry

1 1/2 tablespoons coconut oil
1 large yellow cooking onion, sliced
1 red pepper, sliced
1/2 teaspoon salt
1/2 teaspoon pepper
2 garlic cloves, minced
1/2 teaspoon freshly grated ginger
2 tablespoons red curry paste (medium heat)
1 cup sugar snap peas, cut into thirds or halves
1 (14-ounce) can full-fat coconut milk
2 cups cooked chickpeas (I use canned)
3 tablespoons chopped cilantro


Directions:

Coconut Rice

1.  Heat a saucepan over medium-high heat and add rice, coconut milk, water and salt.

2.  Stir, then bring to a boil.

3.  Reduce the heat to low, cover and let cook for 15-18 minutes, until liquid is absorbed.

4.  Fluff with a fork, then stir in coconut oil. Breathe deeply, cause it smells amazing. Oh, coconut oil, where have you been all my life?


Chickpea Curry

1.  Heat a large non-stick wok (or skillet) over medium heat and add the coconut oil.

2.  Stir in the onions, red peppers, salt and pepper and stir to toss. Cook until the vegetables have slightly softened and the onions are translucent, about 5 minutes.

3.   Add in the garlic, ginger and curry paste and stir to coat. Cook for 5 minutes, stirring occasionally. (Note: powdered garlic and ginger work just as well, just add a little more).

4.   Add in the sugar snap peas and coconut milk.

5.  Increase heat and bring the mixture to a boil.

6.  Reduce the heat to low and cook for 5 minutes. Stir in the chickpeas and cook for at least 5 minutes. If you like your chickpeas on the softer side, like I do, wait a little longer. (Note: If you do that, wait to add your sugar snap peas until closer to the end, so they don't overcook).

7.   In the last 5 minutes of cooking time, stir in chopped cilantro (use fresh). Make sure to save some cilantro for garnish. (Note: If you're one of those people that can't abide cilantro, maybe try flat leaf parsley?  I don't know.  I just wish you liked cilantro).


Verdict:

Lenny ate up two servings and if I may so myself, a pre-schooler's plate doesn't lie.  I'm always so thrilled when she devours something I cook.  I'd highly recommend this if you're looking for more veggie or vegan dishes to add to your repertoire. The Robeau even said it's the best vegan dish he's ever had. Publicly. On Facebook. So he must have like it.   I'm thinking this would be nice with a non-vegan protein (chicken breast?) and green beans.  Lots of possibilities here. Let me know if you try it!


Recipe: Homemade Turkey Soup

20.11.13


Every November for the last 7 (or 8 we're not sure, lol) years I've had a turkey dinner with a group of wonderful girlfriends. We all met working for the same theatre company and have stayed in touch through the years.  Even though most of us have moved on to different career paths we always make sure to take the time to have this meal and bend each other's ears.  There's always a lot of wine and a lot of conversation.  We've been through weddings, breakups, babies, real estate deals, job losses, travel...you name it.  I love having this annual tradition to count on.

You know it's a good party when you forget to take pictures.  I almost always forget to take pictures at this party.  One thing I didn't forget to do this year was save the carcass and make a delicious turkey soup.

What you'll need:

FOR THE STOCK

1 Turkey Carcass, broken into 3 or 4 pieces (with lots of leftover meat on it, including the wings, if you can manage it). My favourite way to do a Turkey lately is by using the super easy pre-stuffed, cooked from frozen Butterball Turkey.
2 Celery Stalks, roughly chopped, including leaves
3 Onions, quartered, skin on
3 Carrots, roughly chopped
3 Parsnips, roughly chopped
6 cloves of garlic, peeled
6 stems of Parsley
1 TSP Dried Thyme
2 Bay Leaves
Salt to taste
Pepper to taste
12 Cups Cold Water

FOR THE SOUP

3 Onions
2 Bunches of Carrots
Salt and Pepper to taste

Directions:

1.  In a large stockpot, combine all of the stock ingredients.

2.  Bring to a boil, skimming the foam (fat) off the top as it boils.

3.  Reduce heat to minimum, cover and let simmer for 5 hours.  Your house will smell  a m a z i n g.

4.  Strain thoroughly, reserving as much of the turkey meat as you can to chop or shred and add to the finished product.

Get your stock started first thing in the morning.
BOOM! Five hours later, delicious stock!
5.  I like to chill the stock (either in the fridge or outside) over night.  The next day, skim off any fat that has gelled at the top.

6.  Add chopped carrots and onions and shredded or chopped turkey to the stock.  Season to taste.  I like to keep the veggies big, especially the onions because that's the way my mom makes her turkey soup, with big onions that curl up and scoop up some of the liquid.


7.  I always have my first bowl plain, as is.  Eventually I'll mix it up and add flat leaf parsley or a squeeze of lemon for acidity or creole seasoning and egg noodles.

This also freezes beautifully, so making a big batch like this is totally worth it.

What are your "must haves" in your homemade Turkey or Chicken Soup?  Let me know, and I'll give them a try when I make this soup again on Boxing Day! I can't wait!


Recipe: Easy Golden Cornbread

7.11.13

Cornbread makes everything better.  This is my easy go-to recipe that's adapted from the Bob's Red Mill cornmeal package.  It's easy enough to whip together at the last minute.  It's also a great recipe to get your little ones to help with. Especially if they love mixing. Don't they all love mixing?


What you'll need:

3/4 cup medium grind cornmeal
1 1/4 cup whole wheat or white flour
1 tablespoon baking powder
1/2 teaspoon salt
1 tablespoon sugar
1 egg
1 cup 2% milk
1/4 cup margarine (or butter)

Directions:

1.  Combine dry ingredients in mixing bowl.

2.  Add egg, milk and margarine and mix until smooth (for about a minute, don't over mix).

3.  Bake for 20 - 25 minutes in a greased 8" square pan.

4.  Serve it warm.  It's so good warm.


Verdict:

Yeah, this is a winner.  It's a staple in our house.  I like to make extra and warm up the leftovers and serve it with jam or honey for breakfast.  It's also a highly adaptable recipe.  You can add charred corn kernels, jalapeño or sharp cheddar to the batter to great effect.  

Let me know if you try this and what your additions are!


Recipe: White Wine and Garlic Slow Cooker Chicken

10.10.13

I've been tinkering with chicken pieces (thighs and legs) in the slow cooker.  So many recipes for chicken in the slow cooker involve condensed soups, heavy cream and cheese and I was looking for something less heavy handed.  What I'm after is chicken that is tender and full of flavour.  After a few hits and misses I think I've landed on something truly delicious.  White Wine and Garlic Slow Cooker Chicken.  Easy enough for a weeknight, yummy enough to serve at a dinner party!


What you'll need:

2 medium onions, chopped
2 medium carrots, chopped
2 celery stalks chopped
6 cloves of garlic, peeled
1 cup of white wine
10 chicken pieces (thighs, legs)
1 package reduced sodium chicken stock gel (I like this kind)


Directions:

1.  Toss the chopped vegetable and peeled garlic in the bottom of the show cooker and nestle the chicken pieces on top.

2.  Pour white wine over chicken.

3.  Add gel stock (in bits) in between chicken pieces.

4.  Season chicken as desired.  I like to use salt, pepper and paprika.  Sometimes I'll add some garlic powder as well.  Yes, even with the 6 cloves of garlic in there.  It adds a little "something".

5.  Crank that bad boy up to high and let it simmer and stew for 6+ hours.

6.  Enjoy the heavenly scent wafting from your kitchen all day long.


7.  The chicken will be very, very tender when it is done.  While it will be falling off the bone if you are careful you can transfer it from the slow cooker into a non stick frying pan to crisp it up and add some more colour.  If you want to add some more richness to the dish brown them in a tablespoon of butter.  You don't need the butter, but let's be real it certainly doesn't hurt.


8.  Serve it up!  I love this with a green salad or with mashed potatoes but my favourite way to serve this is with warm homemade cornbread and fresh, steamed green beans.


Verdict:

This is a winner!  I've been toying with it since our month in New Orleans (when we had a slow cooker but no stove) and it reminds me of that amazing trip and brings me straight to my happy place.  This is also excellent cold so make lots and enjoy the leftovers!


Recipe: Emeril's Braised Chicken Thighs

30.5.13

My awesome pal Jen (often referred to on these digital pages as my honourary "sister wife") is visiting us here in New Orleans this week, which has been so much fun. Tonight, we're going to dinner at Emeril's restaurant Nola and to pass the time until this momentous occasion, I thought I'd share his recipe for Braised Chicken Thighs with you guys.  It's slow cooking at it's succulent tastiest, and worth every second of time and care it takes to prepare.  


What you'll need:

6 chicken thighs (about 2 pounds), trimmed of any excess skin or fat
1 tablespoon Emeri's Original Essence (I used Tony Chachere's, sorry Emeril)
1 teaspoon salt
1/2 cup plus 1 tablespoon all-purpose flour
2 teaspoons olive oil
3 tablespoons unsalted butter
2 cups thinly sliced yellow onions
1 tablespoon minced garlic
6 sprigs fresh thyme, tied in a bundle, or 2 sprigs fresh rosemary (I opted for the Rosemary)
1/4 teaspoon freshly ground black pepper
3 cups chicken stock or canned, low-sodium chicken broth (I went with the low sodium)
1/4 cup chopped fresh parsley
Steamed white rice, for serving

Directions:

1.  Season the chicken all over with the Essence and 1/2 teaspoon of the salt. Place the 1/2 cup flour in a small bowl, and quickly dredge both sides of each thigh in the flour, shaking to remove any excess. Set aside.

2.  Heat 1 teaspoon of the olive oil in a 10-to 12-inch flameproof casserole or saute pan over medium-high heat. Add 2 tablespoons of the butter, and when it has melted, place the chicken, skin side down, in the pan. Brown for 2 minutes on each side. Remove the chicken from the pan and set aside.

3.  Add the remaining 1 tablespoon butter to the pan, and when it has melted, add the onions, garlic, thyme bundle or rosemary sprigs, remaining 1/2 teaspoon salt, and the black pepper. Cook, stirring as needed, until the onions are translucent, about 4 minutes. Sprinkle the 1 tablespoon flour over the onions and cook for 2 minutes longer. Then whisk in the chicken stock and increase the heat to high. Return the chicken, skin side down, to the pan, and bring the stock to a boil. Reduce the heat to medium-low, cover the pan with a heavy, tight-fitting lid, and simmer for 15 minutes.

4.  Uncover the pan, stir the bottom of the pan to prevent scorching, and turn the chicken skin side up. Cover the pan, and simmer for 20 minutes longer.

5.  Stir the bottom of the pan a final time, re-cover, and simmer for 20 more minutes.

6.  Remove the pan from the heat and discard the herb bundle or rosemary sprigs. Transfer the chicken to a serving platter. Add the parsley to the sauce, stir to combine, and then spoon the sauce over the chicken. Serve with steamed white rice. 

Dig in!
Verdict:

The thing I like best about Emeril's recipes is that they are always very straightforward and the food is always so full of flavour.  Just layers and layers of wonderful flavour.  This was no exception.  Also, once you master this technique you can play around with the seasonings and herbs and have something a little different.  Serving this with the white rice definitely gives it a New Orleans feel, but I think it would be even better with mashed potatoes or some crusty bread and a simple green salad.  BAM!


Recipe: Radishes with Baguette and Herb Butter

21.5.13

My favourite thing about Spring is all the wonderful new vegetables.  Well, the Spring veggies and the first day I get to frighten the neighbours by wearing my un-pedicured feet out in open air! I don't care, you guys. Avert your eyes! My feet can breathe!!!  Also, the reappearance of the actual sun, that's good too.  But the veggies are stellar.

Asparagus, so versatile, so yummy, gets all the love.  We roast it, we grill it, we put it in salads and risotto, we drizzle it with olive oil...our pee smells until Canada Day.  But what of the humble radish?  It's always the last one left on the crudite platter, when it's lucky enough to even make it to the table.  We might slice it into a salad once in a while but it always just seems kind of "meh".  How could I find a way to serve it up that was fresh, yet elegant?


Leave it to little French school children and Ina Garten to teach me just how rad the radish really is.  I adapted Ina's recipe for Radishes with Butter and Salt, which she insists parents serve to their children as an after school snack in France.  We get it, France. You're better than us.  You're just showing off now.

What you'll need:

2 bunches of radishes
1 French baguette, sliced diagonally, lightly toasted
1/4 lb salted butter (room temp)
1 1/2 teaspoons minced scallions
1 1/2 teaspoons fresh dill
1 1/2 teaspoon fresh flat leaf parsley leaves
salt and pepper to taste (kosher and ground are best)


Directions:

1.  While your baguette is toasting combine the butter with all of the herbs and the pepper.  Stir until combined.  You could use and electric mixer with a paddle attachment, but honestly, why would you?  A tablespoon works perfectly.


2.  While your baguette is cooling, slice the radishes as thinly as you can.  I'm guessing a mandolin would be perfect here, but I can't say for sure.  I'm threw mine out, I like my fingers more than I like perfectly thin slices of radish.  Do it my way and call it rustic.


3.  Slather the herbed butter on your toasted baguette and layer a couple of radish slices on top.  You can finish it with some fancy salt or even a little lemon juice. 

Verdict:

This is a good one!  I served these with a light Turkey luncheon on Easter and they were a big hit.  At least I think they were.  I was too busy running around talking about French children and their after school snacks to really hear any reviews from my guests.  Something wonderful happens to radishes when they are combined with butter and salt.  Their crunch and slightly spicy quality are both mellowed and somehow highlighted.  I'm hoping that our herb garden thrives this Summer, if it does, I'll be serving this one a lot.  Long live the radish!

Recipe: Quinoa Pesto Salad

6.3.13

What did any of us ever eat before Quinoa became a "thing"?  Honestly, I feel like everyone I know is as obsessed with Quinoa as I am.  And let me tell you, I'm obsessed.  So tasty, so adaptable, so good for you.  I want to tell Quinoa all my deep dark secrets and let it stroke my hair as I fall asleep.  Because Quinoa?  It gets me.

I love serving it in soups and with salads.  One of my all-time favourite recipes is this one for Green Bean Quinoa Salad but last week I wanted something a little less sharp and a little more luxurious tasting and that's how this Quinoa Pesto Salad was born.

What you'll need:

2 cups low sodium vegetable stock
1 cup quinoa
1 package of prepared pesto (170 grams)
1 bundle of green onions
1 pint of grape tomatoes (halved)
1 cup (or more) of corn (fresh off the cob or frozen would work well)
fresh ground black pepper to taste


Directions:

1.  Make your quinoa as per the directions on the packet.  I don't rinse mine or toast it.  I do use vegetable broth instead of water as I find it imparts it with lots of great flavour.  That said, be your own quinoa spirit guide on this one.

2.  Once the quinoa has cooled slightly, stir in the pesto.  I find the small 170 gram tub of prepared pesto is perfect for this.  That said, if you have homemade on hand, knock yourself out.  I think homemade kale pesto would probably be lovely in this as well.

3.  Stir in your chopped green onions (the white and the green parts), your halved grape tomatoes and your corn.

4.  Top with fresh ground black pepper and...enjoy!

Verdict:

This salad is killer and stupid easy.  We served it alongside some chicken thighs but it would be great as a main course on it's own.  It also kept very well and was enjoyed for the next two days for lunch.  This yields a pretty big batch and would be perfect for taking to a pot luck.  I am sure I'll be making this one a lot in the Summer to take to BBQs using gorgeous Ontario corn (grilled, of course) and some heirloom grape tomatoes.

Happy eating!

Recipe: So Easy it Feels Like Cheating Slow Cooker Chicken

6.1.13

Welcome to the easiest most delicious chicken you will ever make.  This is so easy it feels like cheating.  And it makes your house smell sooooo good.  Delicious, fragrant cheating.


What you'll need:

1 whole chicken (buy the cheapest one you can find, fryers work just as well here as roasters)
4 medium sized onions (peeled and quartered)
Paprika (enough to cover the chicken, maybe a tablespoon or a bit more)
Chili Powder (just a little, maybe 1/4 teaspoon)
Salt and Pepper (to taste)

Directions:

1.  Put your quartered onions on the bottom of your slow cooker.

2.  Rest your washed whole chicken on top of the onions.

3.  Season the chicken with paprika, chili powder, salt and pepper.

4.  Cover and cook on HIGH for 4 - 6 hours.

THAT'S IT!!!!  When it's done it will be falling apart.


Verdict:

The white meat is tender and the dark meat is totally succulent, like a confit.  The onions become soft and flavourful and make a great side dish or sauce.  I like to serve this with wilted garlic spinach and mashed parsnips or just a light green salad or even with a side of (forgive me) stove top stuffing.  I could eat this for days, no kidding.  Let me know if you try it, I hope you do!

Thanksgiving. Take Two!

19.11.12


Thanksgiving is one of those annual culinary touchstones.  You do not mess with Thanksgiving.  Even if you're Canadian and you already celebrated Thanksgiving in October. Because, let's face it, a lot of us in the Great White North double dip when it comes to Thanksgiving.  But for me, the second Thanksgiving, the American one is ALL about the food. Which is why, I must admit, I was a little nervous about the idea of facing this challenge: replacing butter with I Can't Believe It's Not Butter in two of my most popular Thanksgiving dishes.  Would my Roasted Brussels Sprouts be received with the same cries of "I didn't know I liked Brussels Sprouts"? Would the last slice of my Sweet Potato Pie be fought over like it is every year?  Only one way to find out!


Roasted Brussels Sprouts

What you'll need:
2 cups of Brussels Sprouts, trimmed and sliced in half, lengthwise
1/4 cup of I Can't Believe It's Not Butter, melted
3 slices of low salt Bacon
3 Shallots
Salt and fresh ground Pepper to taste

Directions:

Toss your Brussels Sprouts with the melted I Can't Believe It's Not Butter and your Salt and Pepper and roast for 20 - 30 minutes in a 400 degree oven.


While they are roasting fry your bacon until it's nice and crispy.  Drain the bacon and use the remaining bacon fat to fry up sliced shallots.  Combine the bacon and the shallots to use as a topping for your Brussels Sprouts.


Verdict:  These are just killer! You'd never know that certain ingredient was missing.  Just don't tell Julia Child!

Sweet Potato Pie

What you'll need:
2 Sweet Potatoes
1/2 cup Brown Sugar
1 tablespoon of Nutmeg
1 tablespoon of Cinnamon
1 Egg
8 tablespoons of I Can't Believe It's Not Butter
2 Frozen Pie Shells (yes, 2, trust you'll want more than 1)


Directions:

Place the whole sweet potatoes in a pot, cover with cold water, bring to a simmer, and cook until the potatoes are done all the way through. Let the potatoes cool slightly, and while they're still warm you can easily remove the skin.

Add the I Can't Believe It's Not Butter, Egg, Sugar, Nutmeg and cinnamon and blend together.  I like to use my hand mixer, but a stand mixer or a wooden spoon and some determination would work as well.  Just make sure to blend the filling until it's really smooth.

The next part is a little tricky, so stay with me (natch). Fill the pie shell and bake at 350 degrees for 1 hour and 15 minutes.  Let cool and serve.  Preferably with Whipped Cream, because why not?


Verdict:  Another home run, and with our secret ingredient, why not have another piece?


After the success of this little experiment I can't wait to try making my Turkey and Stuffing with I Can't Believe It's Not Butter.  Happy Thanksgiving to all of my wonderful American friends and Happy second delicious big meal day to my fellow Canadians.
Proudly designed by | mlekoshiPlayground |